Thursday, June 7, 2012

Ruffled Nails

Today's manicure I found on Pinterest from Chalkboard Nail's blog. I thought I'd try it out.

 The colors I will be using are:
Sally Hanson Insta Dry - Jumpin Jade
Rimmel London - Black Satin
China Glaze - Urban Night
Rimmel London - Wild Orchid
China Glaze - Traffic Jam
 OPI - Mermaid's Tears

Start by painting the base coat color.

Then get your dotting tool ready! I used the second biggest dot, but looking back on it, I might use the largest dot. I always use the lids to my plastic shoe box containers that I keep all my nail polish in. It prevents spills and I can put polish on it and wipe it off the next time I take my polish off.

So, I've got a dotting tool, two purple lids, a small thing of acetone to dip my dotting tool in between colors, and a cotton pad to wipe off my dotting tool. You can see some polish already on the lid on the right, just drip some polish on there and then use that to get polish on your dotting tool.  Then start dotting!

 Starting the dotting, I thought they looked like mustaches.  (I mustache you a question, but I'll shave it for later...)

 Here are my rows of dots all finished, I haven't cleaned up yet.  I finished with black on the tips to give it a nice clean edge.

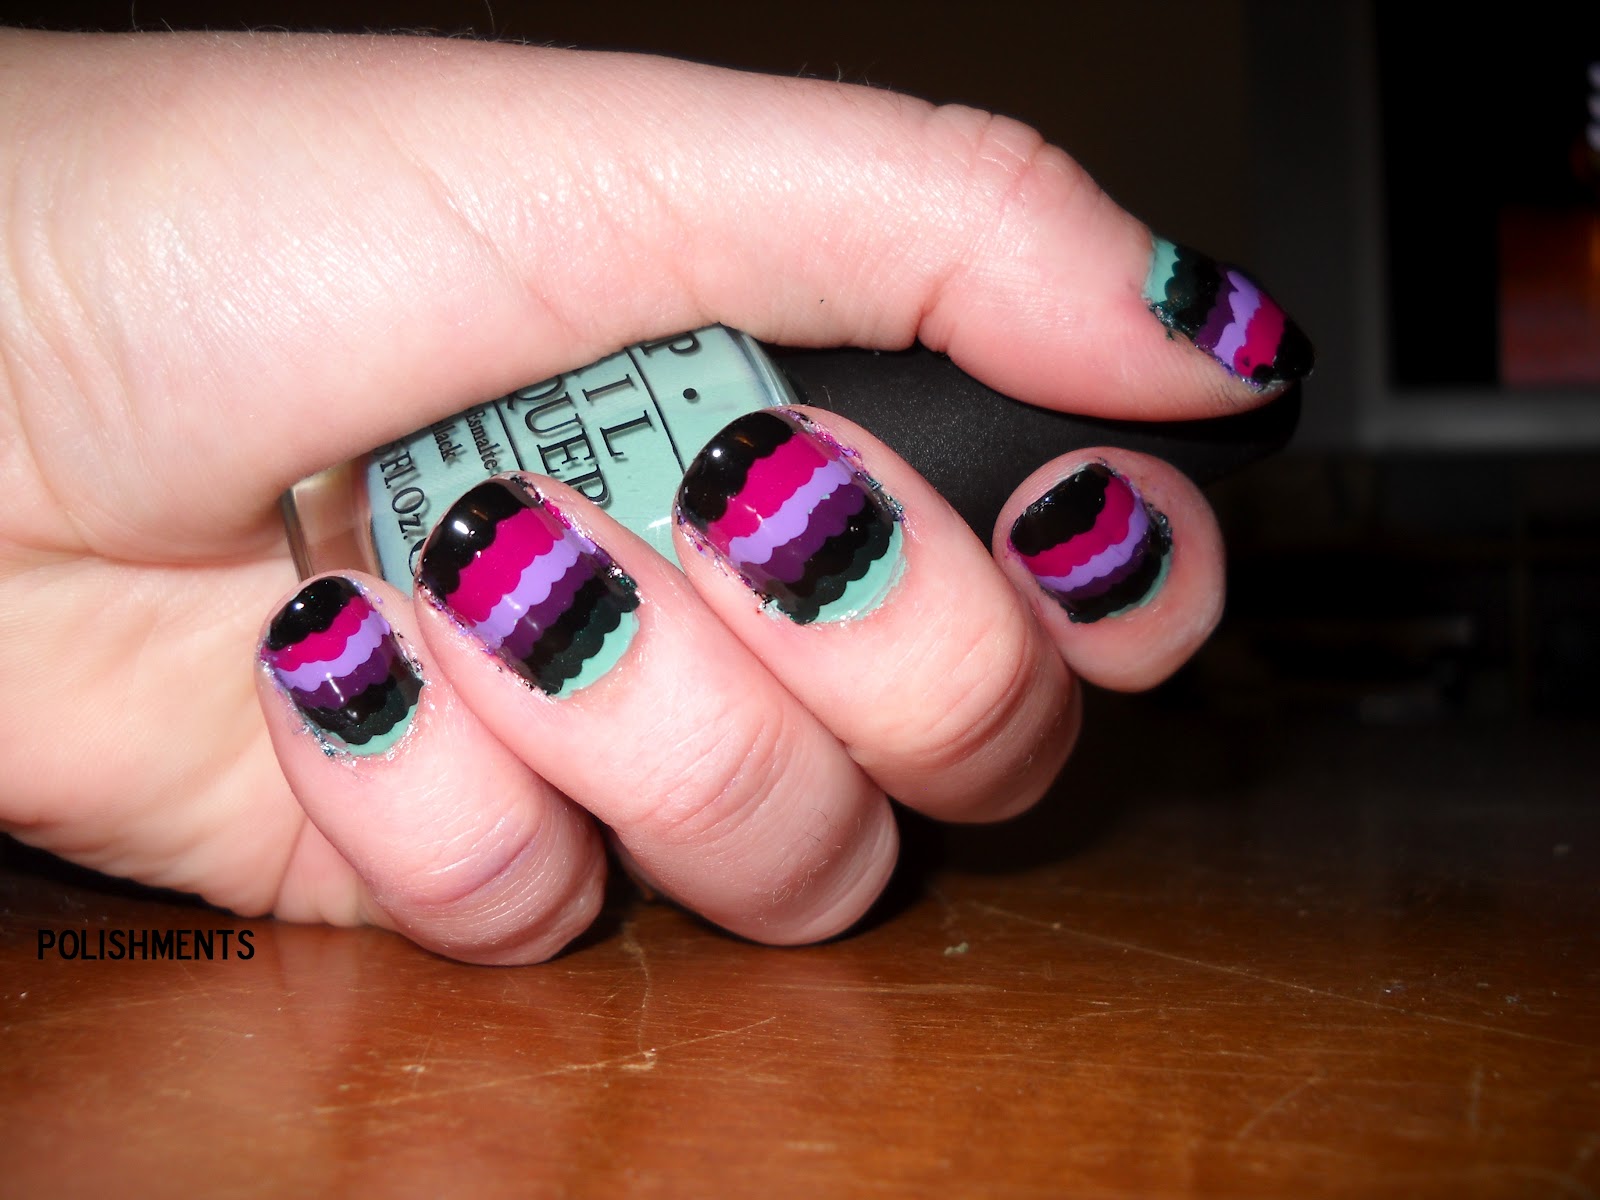
All finished! A cute and easy manicure. I really like the outcome. It would be fun to only use two colors and make ruffled stripes! If you try it out, let me know!

Wednesday, June 6, 2012

Texas - The Lone Star State

As my husband and I prepare to move to Oklahoma (hey, Oklahoma is OK!) I decided to paint Texas on my nails. I was born and raised in Texas and love it dearly. Oklahoma is just like north North Texas anyway, right?!

Colors used:
Sally Hanson Xtreme Wear White On
Sally Hanson Xtreme Wear Blue It
Revlon Pure Pearl
China Glaze High Maintenance

Not one of my best manicures...it is a little messy.

One thing I did to make the star was to use an ordinary plastic sandwich bag.  You can paint directly onto the bag and then when the nail polish is dry, pull off your picture/design and stick it on your nail. One coat of top coat and you are done. I've done this method before when I did a Nyan Cat themed manicure.

The thicker the nail polish on the bag, the easier it is to come off. And if you are doing multiple colors, I would recommend putting down a white base coat first. This had a base coat of the Sally Hanson Xtreme Wear in White on and then another coat of Revlon Pure Pearl.

Tuesday, June 5, 2012

Polka Dots

For today's polka dot nails I used:
China Glaze - Urban-Night
China Glaze - Hook and Line
China Glaze - Traffic Jam

I also used my dotting tools. I bought mine from Amazon for around $6. You can also use toothpicks, bobby pins or a pin. With the pin, stick it into the eraser end of a pencil. It gives you a more sturdy handle to work with.


I used the Urban-Night as the base coat and then placed random dots of Traffic Jam and Hook and Line around my nail. It turned out pretty cute.

Friday, June 1, 2012

Water Marble - A Quick How To

Water marble - a quick how to.

Supplies:
Sally Hanson Hard as Nails base coat
Sally Hanson Insta-Dry top coat
Sally Hanson Xtreme Wear White On
Sally Hanson Xtreme Wear Black Out
Scotch Tape
Orange Sticks 
Cup of water

To start, you need to put on your base coat and a coat of your lightest color, in my case it was a coat of the white. This base coat doesn't have to be beautiful, it is just there so no nail shows through.


Yucky, I know.

Once you've got that done, let's talk tape. You should tape around your nail so that you have a little less mess. Play around with it and figure out what taping method works best for you.


Get your cup of water ready. Don't use a Styrofoam cup. The nail polish will eat through it. I found this out the hard way. Doh!

 Place your first drop and let it spread. This will form a skin almost on the top of the water.
 Now place your drops of nail polish.  To get the wider rings place dots of the same color. I would do about three drops of black to one drop of white.
Take one of your orange sticks and swirl your colors together. Be careful to not swirl in the first layer of the polish you dropped, it will just mess up the drops in the middle.

Then you dip your fingers in. When I first learned to do this by watching videos on YouTube, I always saw them dip in one at a time. I've figured out you can dip in as many as you want at a time. It helps save time and nail polish.  As you can see it does get messy, but that is what the tape is for!

After you dip your fingers, leave them there for a second and get an orange stick and swirl up the extra nail polish. It is the coolest looking thing! It swirls up like cotton candy almost.

Let them dry for a few seconds after you pull them out of the water and then pull the tape off. If there is a nail you don't like, redip it in some new swirled nail polish. You don't even have to take the old polish off, it will cover it right up.

Top coat it, and you're done!  This picture is before the clean up.

You can use whatever colors you want and as many colors as you want. It is definitely a fun manicure!